Thursday, 11 January 2018

Enable/Disable iptables firewall in linux

Enable/Disable iptables firewall in linux:
# /etc/init.d/iptables save
# /etc/init.d/iptables stop
# /etc/init.d/iptables start

On Boot:
# chkconfig iptables off

# chkconfig iptables on

Thursday, 18 May 2017

SQL Plus Important Commands

How to Connect to sqlplus?
Type "sqlplus" in terminal and enter user-name and password.
On successful login below information will be displayed along with version information
Connected to:
Oracle Database 11g Enterprise Edition Release 11.2.0.4.0 - 64bit Production
With the Partitioning, OLAP, Data Mining and Real Application Testing options

How to exit sqlplus?
Type "quit " to exit from sqlplus

How to login using command line arguments?
Type sqlplus system/pass (It opens a connection to our local database)
To login to schema use below command
sqlplus schemaname/password@SID(Servicename defined in tnsnames.ora file)

How to check location of sqlplus?
Type which sqlplus

How to check sqlplus environment variable?
Type echo $PATH

How to check Oracle SID?
Type echo $ORACLE_SID

How to Start and stop the listener?

Command: lsnrctl using this command we can start/stop the listener by tying start/stop command

Linux Performance Monitoring

Friday, 29 January 2016

Resolving DNS Caching Issue while Performance Testing Web Services.


How to disable DNS Caching in Load Runner to avoid misleading performance results while testing Web services.

Protocol Type:

Web Service


Scenario/Flow:

Load Runner-->WIP(Global Load Balance)-->VIP(Local Load Balancer)-->Host(Web Logic Server)

Note: WIP is a DNS service, the DNS reply can be cached locally and some load tests could give misleading results like the response time of web service request differs from the actual response time.


Issue:

Request was not reaching to WIP and it was not asking the WIP for DNS resolution or DNS lookup(translation of the unique IP address or domain of host in textual format to an IP address).


Symptom:

Local DNS Caching(Applications can cache the DNS reply, as can local DNS servers).


Resolution:

As the Web Service protocol in Load Runner does not have any option to disable DNS caching, we need to create a script using Web HTTP/HTML protocol by converting all your SOAP or JMS calls using web_custom_request in Web HTTP/HTML protocol. Once the migration is done, go to Runtime Setting > Click on Preferences under Internet Protocol group>Click Options button>Change the DNS Caching option to NO under General Tab(by default it is set to YES).


Monday, 26 October 2015

Database Performance testing using JDBC connection through Jmeter

Follow below steps to configure the Jmeter to connect your database.

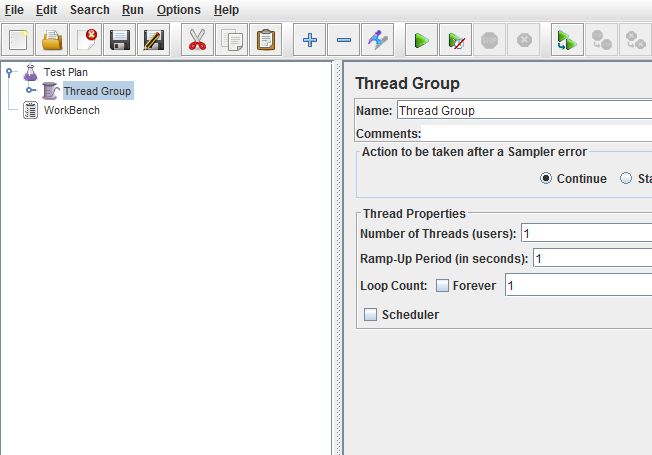
STEP 1: Open a new Test Plan and add a Thread Group in it.

STEP 2: Add a 'JDBC Connection Configuration' from 'Configuration Element' menu into the Thread group.


STEP 3: Configure the 'JDBC Connection configuration' with respective database/tables as described below.

*Variable Name : We need to create a name for the JDBC pool. So that we can reference the pool name while executing a SQL query.

*Pool Configuration : Need to provide the number of concurrent connection in 'JDBC POOL'. (we used just 5, which means we can run just 5 parallel users only). Need to specify the pool timeout value too.

Database Connection Configuration : This is the place we need to provide our database name, host and port.
The access credentials needs to be added into it.

JDBC Driver Class:
Jmeter does not come with mysql JDBC driver. We need to download the latest JDBC mysql driver from Oracle site and hold a copy in Jmeter/bin folder. Mention the driver name in this column.
Only if we have a valid driver name, we can execute the query.

STEP 4 : JDBC Sampler
Add a JDBC sampler from ADD > Sampler > JDBC Request.


STEP 5: Add the SQL


* Give the sampler a valid name to be referenced in results

* Provide a valid Variable pool name, which we created in STEP 3 ( 'JDBC POOL')

* Type your SQL Query in the space provided.


STEP 6: Add a View Results Tree to observe the results.


STEP 7 : Para-metering the SQL

Create a list of parameters to be used in SQL in a 'User Defined Variables' configuration.


Refer the above created parameters in the SQL as required.


STEP 8: Execute the Jmeter


Configure the Thread group with number of Threads. These value give the number of Vusers run concurrently. 

Please make sure these value does not exceed the pool configuration connection count 5(STEP 3)


Now you can observe the result of SQL in the 'View Results Tree' node.